Foil Range
We use the FoilCo foils range, and whilst the choice is very large, you may not want to pay for a whole roll!
So we’d advise selecting something we already have in stock.
…if you do have your heart set on a particular foil or foils, feel free to ask :-)
Artwork should be…
Vector-based
When creating artwork for foil, it’s important to remember that it must be created in vector format (not bitmap/raster) as the artwork is output on film at a resolution of more than 1000dpi (generally, high resolution bitmap art is 300dpi).
Using pixel-based bitmap/raster artwork would result in a die with jagged edges, which will cause problems in foiling and make your final product look terrible. Vector art, on the other hand, doesn’t have pixels as it’s all mathematical lines and curves that can be expanded or reduced without affecting the resolution.
In practicality, this means that your artwork needs to be created in Illustrator or InDesign or another program that creates vector based PDF files (Not Photoshop!).
100% Black
You can’t make a gradient or do shading in a foil. You can only do black and white. No grays. Foil art needs to be created in black on a white background in a CMYK color space where black is 100% black and all other values are 0% (C0% M0% Y0% K100%).
1:1 Scale
The foiling block will be manufactured to the size of the artwork you supply. Please ensure your artwork is exactly the same size you want the foil to be stamped. This is especially important if the foil needs to align with standard print.
Multiple Colours/Foils
We can only foil one colour at a time. For jobs requiring foil in more than one colour, please be aware that each will need stamping separately with its own block.
Font sizes
About 5pt type is considered to be the minimum type size for successful foiling, though this does depend very much on the font used (script & serif tend to be worse than sans serif and block fonts)
Strokes & Outlines
Please consider 1pt to be the minimum thickness achievable. This is especially important if you are intending to use magnesium dies as a raised area this thin will probably disappear after a few hundred impressions (harder dies are sometimes available, but they cost more!).
Reversals
Please consider thickening up your artwork for reversals as they tend to fill in if too fine.
TOP TIPS
Try to break up large areas of foil. Solid areas such as a path of 50mm x 75mm are very hard to foil. Those of you who’ve ever tried to put a screen cover on a smartphone or tablet will know that trying to get something cleanly on such a large area without having dust or air pockets is near impossible.
Avoid having large areas of foil mixed with fine detail. Large areas require a different release foil and more pressure than fine detail. Mixing the two on the same die means using a medium-release foil and trying to adjust it for both the detail and the large blocks of foil. This can add hours of labour, a lot of waste and even making the job impossible to run.
DISCLAIMER
Even given all the above, some artworks just don’t work as foil, please contact us and talk things through if you are unsure, we’re always happy to talk.
Hot foil printing is a completely separate process to our colour printing, so if your order requires both colour print and foiling, you will need to submit the colour and foil artwork separately, along with a mockup image featuring both colour and foil parts for our reference setting up the job.
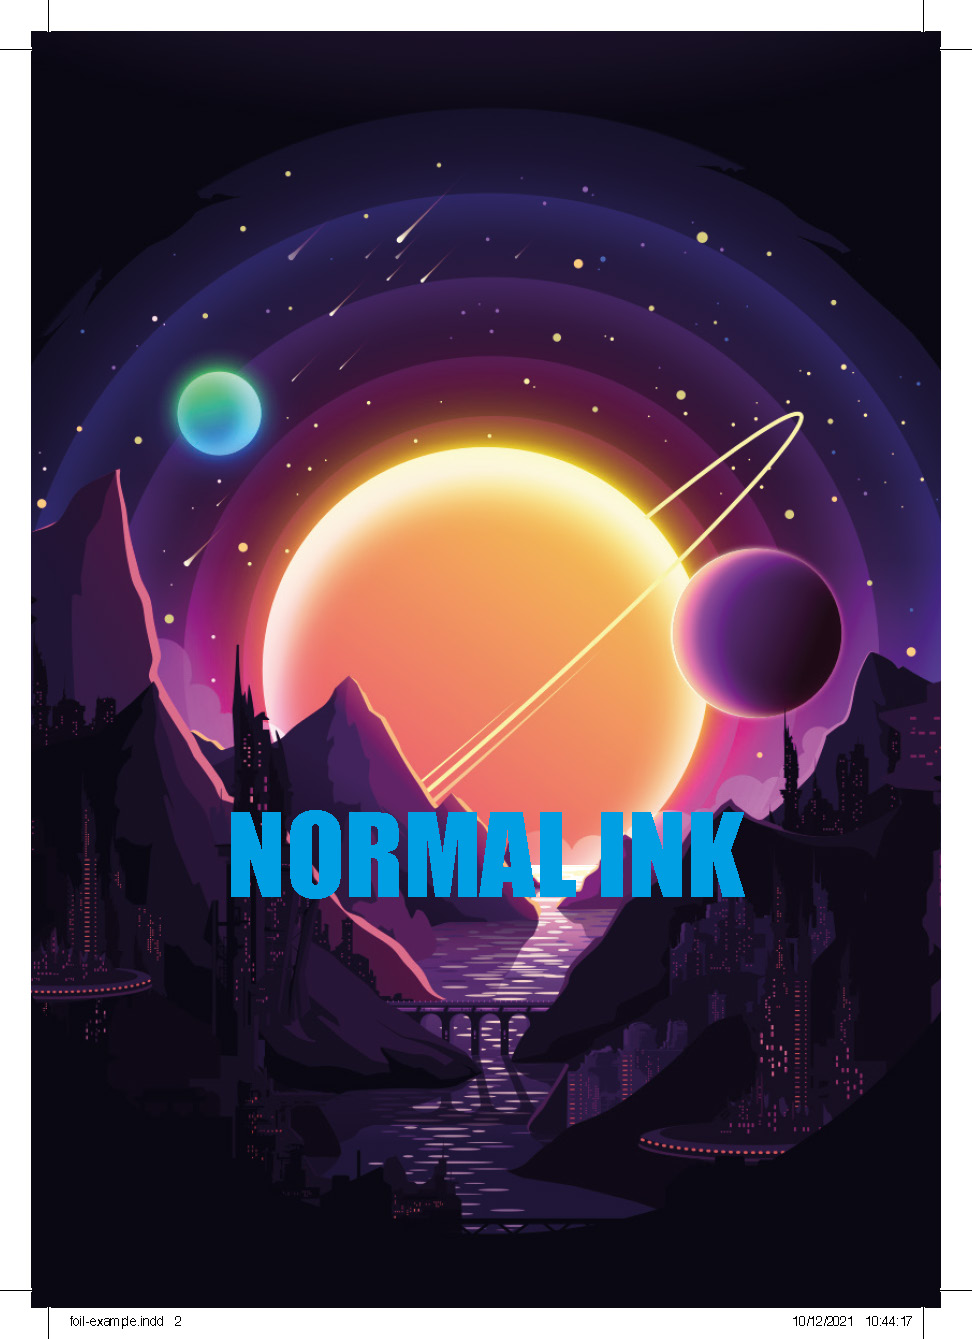
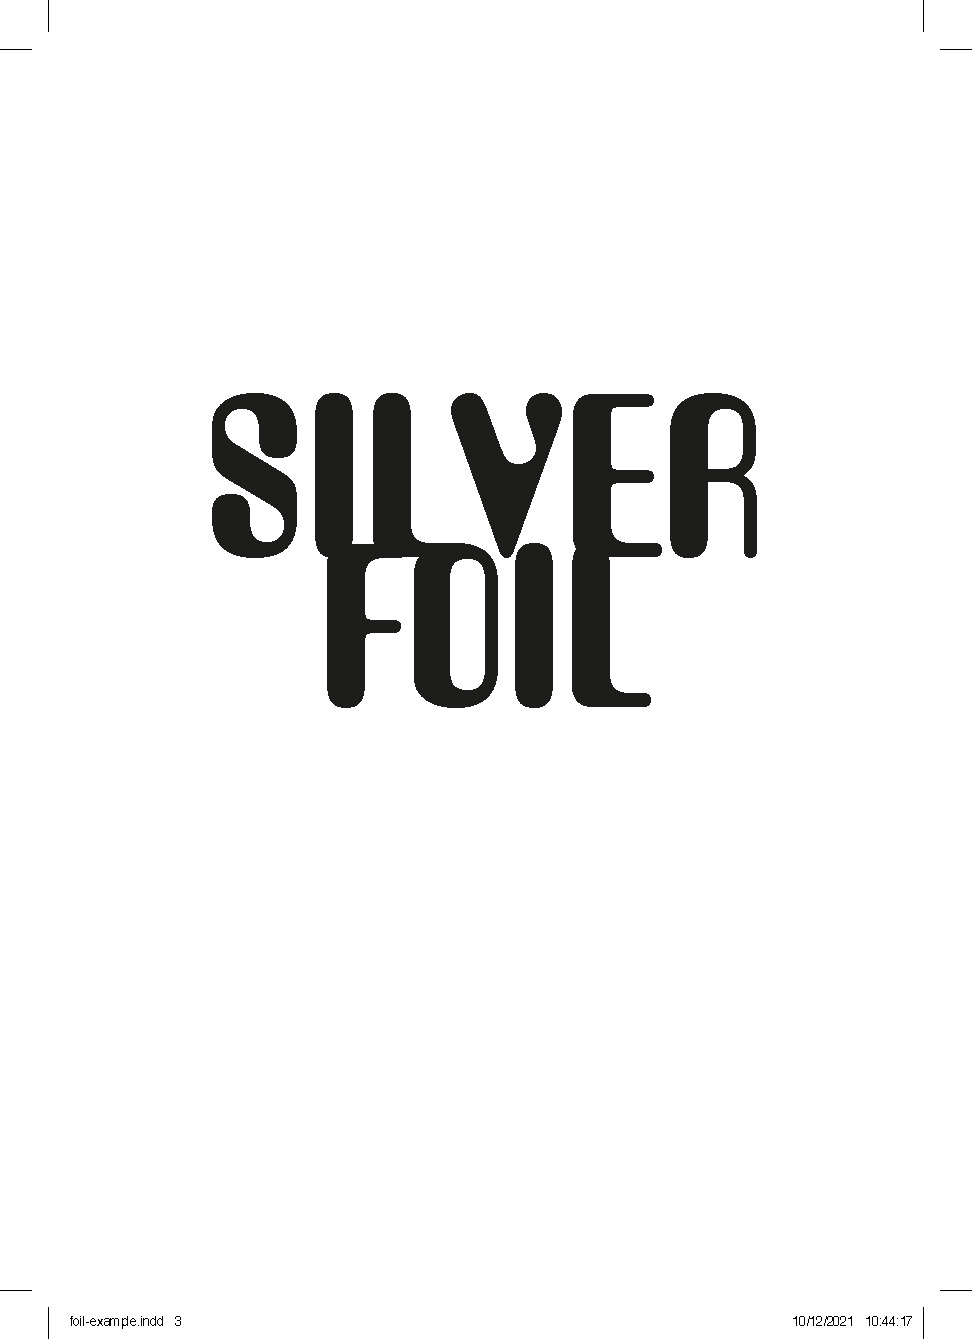
We prefer a multi page .pdf showing…
Page 1.
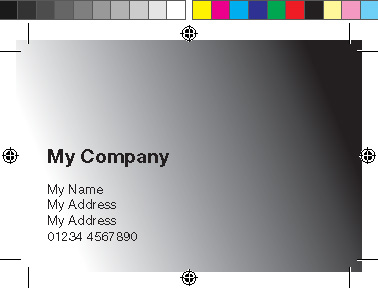
A composite image showing the special finish and the print.
Page 2.
A ‘print only’ version of the artwork, with the special finish removed – but not ‘knocked out’.
Page 3.
The special finish, be that foil or spot UV etc. In black!

There are variations to this for multi-page documents, double sided cards, pages with no UV, pages with UV, etc.
A further example might be
Page 1, the composite print.

Page 2, the print part
Page 3, the foil part
and this file is the complete 3 page .pdf example including bleed  .
.
Over printing metallic materials.
For printing on a metallic material such as a self adhesive metallic label, the procedure is slightly different.
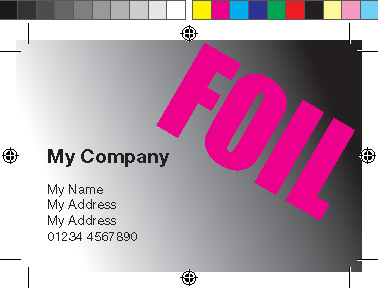
To produce a Gold letter G, with a black outline on a White label – the artwork should be as follows.
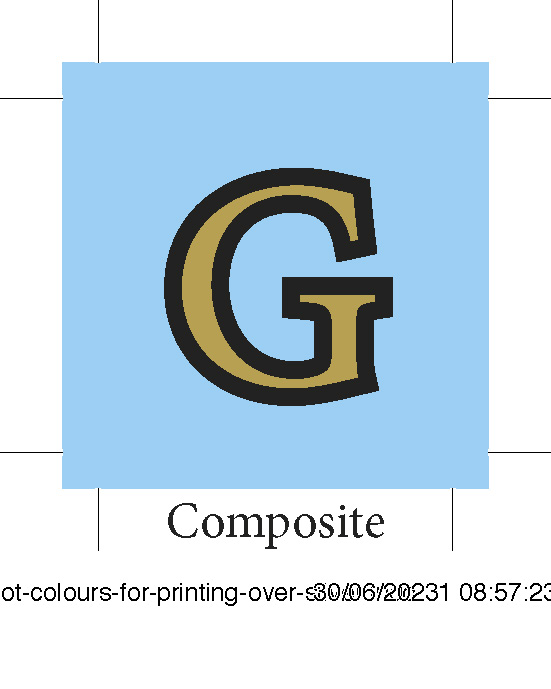
Page 1 – Composite
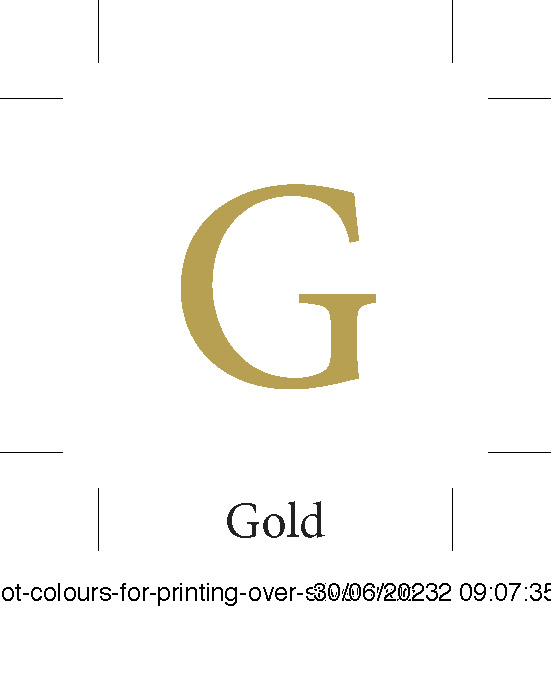
Page 2 – Foil
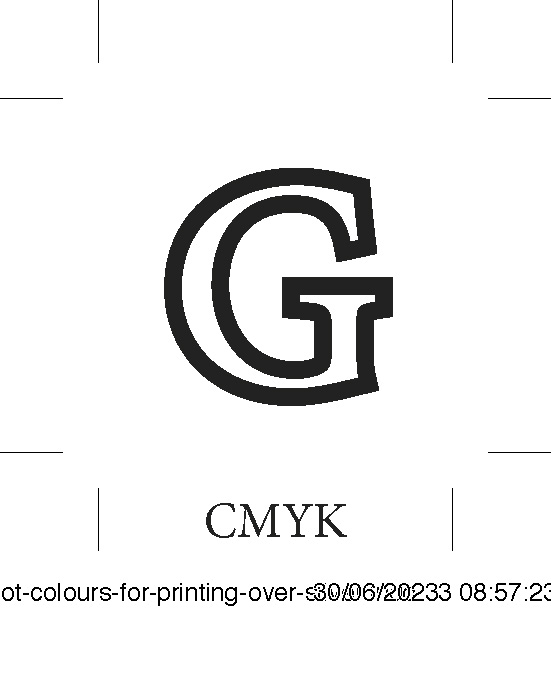
Page 3 – CMYK
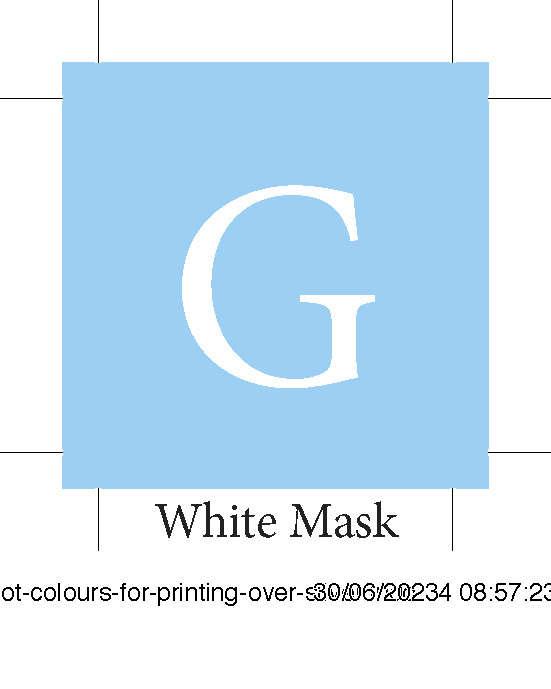
Page 4 – White Mask
You can download the pdf and indesign files for this zip file.
Your designer should understand the above, and you’re always welcome to give us a call for advice!